3 easy step to Automate your SFI business
Today I will be sharing my strategies to grow and automate my SFI business to help all of my team members to do exactly the same.
The setup instruction are outlined in 3 easy steps you can do. But first, you must be an SFI affiliate. So if you havent join SFI, you can do so join here. Its free.
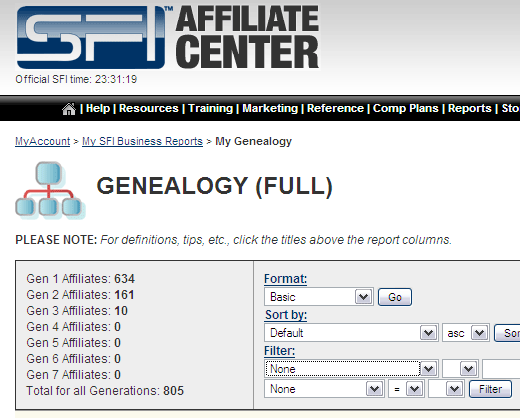
Let me share with you how I brought in over 805 affiliates all on Autopilot.
Below is a screen shot of my SFI account
Step 1, lets configure the autoresponder system to put your business on Auto Pilot.
I can’t stress enough the importance of following up with SFI signups. I would imagine that my business would be nowhere near as successful as it has been were it not for following up using my various autoresponders. What’s more it is now totally on AUTO-PILOT!
Below I will show you how to upload the followups from my personal autoresponder into your own. Then I will explain how to customise these messages with your own personal and affiliate info so that they look like your own and more importantly you get any credit for sales made from them. The affiliate info included will be your Plug In Profit Site, SFI, and Traffic Swarm.
These messages will also go a long way to supporting and encouraging your personal affiliates to upgrade their SFI accounts.
Bookmark this page (Press Ctrl + D on your keypad) and pass it on to all your affiliates. The more this process is duplicated the better for us all.
Below I will outline a step by step process for implimenting the steps above. You must have a Getresponse Pro account to do this. If you don’t already have a Getresponse account then you can get one here.
If you already have a Getresponse account then read on:You will need to set up a new responder at your Getresponse account. To set up a new responder log into your Getresponse and click the “Setup & Manage Lists” on the left hand side. Then click the “Create a new list” link and set up a new responder. You will need to name it something original.
Download my SFI followup messages HERE, and create them in your account.
- Log into your getresponse account by clicking here.
- Log into your “New” responder by choosing it from the drop down menu at the top left of your screen.
- Click the “Create New Messages” link at near the top of the screen.
- Select I do not need a template, then hit next step.
- Copy day one content and hit add message.
- Repeat this step until you have completed all the follow up message with the day interval
That’s it! Well done, you have loaded my follow up messages into your account. Now you need to customise them with YOUR affiliate IDs and personal info. To do this follow the remaining steps:
Before your Getresponse account is completely configured you need to make sure that your details and affiliate links have been entered in the correct place so that they will be entered in the appropriate emails in your followup series.
Adding Your Variables To Getresponse
The “variables” section in your Getresponse is basically where you can make a change with one or two clicks and effect the links in all your messages.
This means that I can set up an email campaign, you can upload them and by adding YOUR variables you changes links in the messages automatically without having to change every message manually or individually.
For example one affiliate id in your Getresponse messages may look like this http://www.[[pre_sfi_id]]/MG
By going and inserting a variable in the [[pre_sfi_id]] field of the “variables” section of Getresponse you can automatically change this link in your followups. In this case I would insert quickinfo247.com/235051 in the [[pre_sfi_id]] field.
Now lets see how we add your “variables” which effect every message in your followups.
Please note: If you are not a member of any of these programs then it is important that you leave something in the variable fields otherwise there will be dead links in your emails.
Adding Your “Variables” Steps:
- Along the top of your Getresponse page click the “Prospects” section, scroll down to “Variables” and click.
- You should now be on the “Variables” page. Scroll down and you will see two form fields which read “Variable Name” and “Predefined Value” respectively and a check box which read “add also for slave accounts”. Usung these boxes you will add your info to the followup messages. Let us see how to do it.
- Here is a list of what each variable relates to and how to add YOUR info:
- name_id = This is your “name”. If you don’t know this then you need more than a followup series;-). To add YOUR info: In the “Variable Name:” box add the words “name_id” without the quotes. In the “Predefined Value:” box add YOUR name(ie John Smith). Leave the “add also for slave accounts” box unchecked. Click the “Add/Update Variable” button.
- domain_id = This is your main domain name. You can basically put any website address here. If you own a Plug In Profit Site then it is a good idea to enter this URL. You can get your own website here. To add YOUR info: In the “Variable Name:” box add the words “domain_id” without the quotes. In the “Predefined Value:” box add YOUR website domain name(ie freeadvertz.com). Leave the “add also for slave accounts” box unchecked. Click the “Add/Update Variable” button.
- plugintraining_domain = This is your Plugin Profits Training site address. If you don’t have a training site for your Plug in team nor a Plugin site then leave this and move on to the next step. To add YOUR info: In the “Variable Name:” box add the words “plugintraining_domain” without the quotes. In the “Predefined Value:” box add YOUR training site address(ie myteamtraining.com). Leave the “add also for slave accounts” box unchecked. Click the “Add/Update Variable” button.
- plugin_domain = This is your Plug In Profit Site affiliate domain name. If you dont have one then leave this and move on to the next step. To add YOUR info: In the “Variable Name:” box add the words “plugin_domain” without the quotes. In the “Predefined Value:” box add YOUR Plug In Profits affiliate domain name and affiliate number(ie pluginprofitsite.com/main-7387). Leave the “add also for slave accounts” box unchecked. Click the “Add/Update Variable” button.
- sfi_domain = This is your SFI affiliate domain name. To add YOUR info: In the “Variable Name:” box add the words “sfi_domain” without the quotes. In the “Predefined Value:” box add YOUR SFI affiliate domain name and number(ie moreinfo247.com/8902557). Leave the “add also for slave accounts” box unchecked. Click the “Add/Update Variable” button.
- trafficswarm_domain = This is your Traffic Swarm affiliate ID. If you don’t have a Traffic Swarm id you can get one here(This is free to join). If you don’t want to do this then just leave then leave this and move on to the next step. To add YOUR info: In the “Variable Name:” box add the words “trafficswarm_domain” without the quotes. In the “Predefined Value:” box add YOUR Traffic Swarm affiliate domain and number(ie trafficswarm.com/go.cgi?318138. Leave the “add also for slave accounts” box unchecked. Click the “Add/Update Variable” button.
- trainingsite_domain = This is your SFI Training site address. If you don’t have a training site for your team then then leave this and move on to the next step. To add YOUR info: In the “Variable Name:” box add the words “trainingsite_domain” without the quotes. In the “Predefined Value:” box add YOUR training site address(ie sfielite.com). Leave the “add also for slave accounts” box unchecked. Click the “Add/Update Variable” button.
Congratulations! That’s it you have set up your SFI Followups now all you need to do is come to your Getresponse account whenever you get a new affiliate and add them to the series(See below for instructions).
Most Important
Test your emails to ensure that they contain all YOUR affiliate info. To do this follow the instuction below. This is very important.
Testing Getresponse Email Followups
Steps:
1. Log into your Getresponse account here:
http://www.getresponse.com/login.html
2. Along the top of the page hold your mouse key over the “Messages” section, scroll down to “Test Messages” and click.
3. You should now be on the “Test Messages” page. Scroll down a little.
4. Where you see “Your e-mail” enter your regular email address.
5. Click the downward arrow where you see “Choose Message” and choose “All messages” or choose a particular message from the list that you want to test. If you choose “all messages” everyone of the emails from your campaign will be sent to your email account.
6. Click the “Send test message!” button.
7. Check your email account to have a look at what your prospects see everyday when they open their in-boxes.
Note: Now every time you get an email notification of a new SFI Affiliate add them to this autoresponder to encourage them to upgrade. To do this log into your Getresponse account go to your SFI Followups account using the drop down menu at the top left of your Getresponse accout, then go to “Prospects”, then “Active prospects” and use the form there to add the new affiliates to your autoresponder system.I have added a link to this training site at the bottom of each followup message which you are free to remove. I hope you keep it there in appreciation of this series and also to make sure your team get access to training and support.
Good luck with your marketing. Tomorrow, I will show you where I get my leads from, and how to import them to your campaigns.
Andy Huang